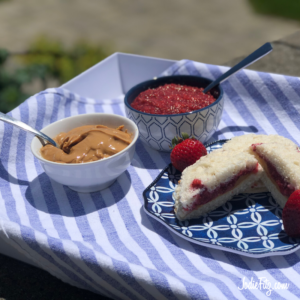
Embrace strawberry season with some fresh, easy strawberry chia seed jam. This recipe is sweet, delicious and fruit packed. It takes 10 minutes to make and is a no-cook recipe. Not having to turn on the stovetop or the oven during the summer months is always a win-win, but it’s still fun to be in the kitchen creating and playing with food flavors.
This recipe is great to make with the kids in the morning. You can then enjoy it together at lunchtime, snack time or on summer picnics.
The chia seeds, also part of the super food group, serve as a natural thickening agent that happens to be “jam”–packed with goodness.
I love that I can make this for the week, control the amount of sugar and replace granulated sugar with honey.
Easy, No-Cook Strawberry Chia Seed Jam
by Jodie Fitz
1 pound fresh strawberries
3 tablespoons PICS honey or agave nectar
1 teaspoon PICS vanilla extract
3 tablespoons chia seeds
Wash and hull the strawberries. Pat them dry, or let them dry. Slice the strawberries.
Place the strawberries into a food processor or blender and blend until the strawberries are pureed.
Add the vanilla extract and honey. Mix the three ingredients together a little more in the food processor or blender.
Pour the mixture into a bowl. Fold the chia seeds into the pureed strawberry mixture.
Place the entire strawberry chia seed jam into a mason jar or other airtight container and place it in the refrigerator for at least two hours before using.
How long does it last in the refrigerator? You can keep your easy Strawberry Chia Seed Jam in the refrigerator for 3 to 5 days.
Can you freeze this jam? Yes you can!
Lessons for kids when making this recipe:
- Preparing fruit
- Hulling strawberries
- Measuring ingredients
- Folding
- Blender and/or food processor safety
- Following directions
- Natural thickening agents
Grab the kids, the paints and get ready to finger-paint in a whole new way!
What do you need?
• 1 white apron per child
• Purple paint
• Blue paint
• Green paint
• Yellow paint
• Orange paint
• Red paint
• White paint
• A paper plate or palette (preferably one per child)
• Water
• Paper towel or rag
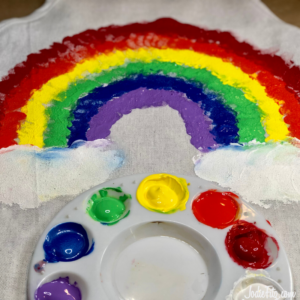
- I recommend you put down a covering on the table before you begin the project to protect your surface as the paint can seep through the apron.
- Dip your thumb or finger into the purple paint and begin to create a rainbow arch starting with the smallest arch of the rainbow.
- Wash or rinse and dry that thumb or finger before dipping into the next color of paint.
- Just like the video, add the rest of the colorful rainbow arches: blue, green, yellow, orange and red. Don’t forget to wash/rinse your fingers between each color.
- You can let your rainbow dry before adding your clouds or you can do what I do, which is add the clouds right away. I like pulling some of the colors of the rainbow down into the puffy clouds like the video demonstrates – the option is yours!
- Optional: Add your name or words to the project like ‘Hope’, ‘Joy’, etc.
- Let it dry completely before wearing.
Your DIY Rainbow Craft apron is great to use as a smock for crafts, a smock for gardening or an apron for recipe making!
Rainbow Arch: If you have an independent child that wants to do it all or a young child that needs help with the arches of a rainbow, simply use a medal compass with a pencil to create the arches of the rainbow for them to follow. You can even put one dot of each color at the start of an arch so follow the colors or let them go free spirit. It’s good either way!
The Paints: The best paint to use for this project is fabric paint. However, you can use other permanent paint options like an acrylic craft paint, which just makes the area on the apron of your finger printed rainbow a little stiffer. Your apron will still be colorful, wonderful and useful!
Don’t Forget: Don’t forget to put on a smock, an apron, an old t-shirt or play clothes before doing this project. The paint will not come off of your clothes if it gets on them in the rainbow making process!
Now What?
Grab your aprons and join me in making recipes at the Price Chopper/Market 32 Kids Cooking Club! We have all kinds of delicious recipes! Coming soon…I will be introducing a no-rise dough pizza making activity for kids that coordinates with both the Kids Cooking Club and my book Fidget Grows a Pizza Garden.
This rainbow apron is easy and fun to make, and you can view it here
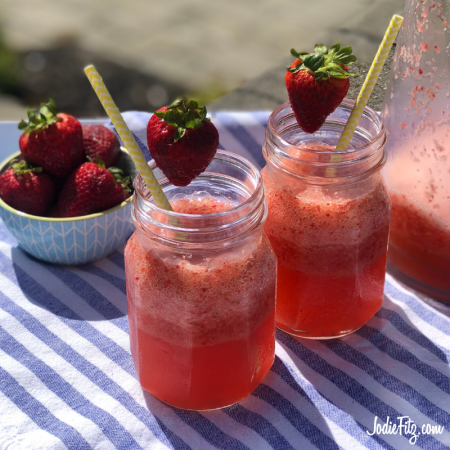
Looking for a refreshing recipe to cool things down while having fun with the kids in the kitchen at the same time?
Check out my Homemade Strawberry Lemonade. It’s a great recipe to make with the kids without having to heat up an oven or turn on the stovetop.
Simply grab the blender, a few key ingredients and blend your way to recipe making yum. Even the simplest of recipes helps to strengthen and/or build kitchen skills while boosting recipe making confidence.
Here are a few key lessons to focus on when making the Strawberry Lemonade with children:
- Preparing fruit
- Hulling strawberries
- Slicing
- Extracting juice from lemons
- Measuring ingredients
- Following directions
- Blending
- Knife safety
- Blender safety
Homemade Strawberry Lemonade by Jodie Fitz
1 cup fresh sliced strawberries
2 whole lemons,
4 cups ice
2 cups water
½ cup PICS honey or organic agave nectar
2 teaspoons PICS vanilla extra
Prepare and measure the strawberries by washing them, hulling them and then slicing them before measuring.
Note: When making this recipe with younger children or children who have not sliced before, begin cutting soft fruits with a plastic knife until they become confident and understand safety procedures. Always remind them to be mindful of where their fingers are and to always make sure fingers are clear before cutting anything.
Cut the lemons in half to create four halves. Squeeze the lemon juice from the lemons.
Note: If you have a citrus squeezer simple squeeze it right into a blender pitcher, because it will catch the seeds. If you do the lemon squeezing by hand, simply squeeze the juice into a liquid measuring cup so that you can extract the seeds from the juice before pouring the freshly squeezed lemon juice into the blender.
Add the ice, water, strawberries, honey and vanilla extract together with the fresh lemon juice in a blender. Blend the mixture well; until the ice is crushed.
Serve and enjoy!
Cinco De Mayo and Mother’s Day in the Kids Cooking Club
Written by Jodie Fitz
I am so excited to be in the kitchen experimenting and sharing new recipes with you at the Price Chopper/Market 32 Kids Cooking Club. There’s been a lot happening behind the scenes with bringing activities, recipes and videos on line for you. We have even spruced up the Kids Cooking Club logo, which looks great; make sure to take a peek at everything including my new character releases for added fun at home.
What’s happening in May? Mother’s Day and Cinco de Mayo!
We have a couple of things we’d like to highlight for you:
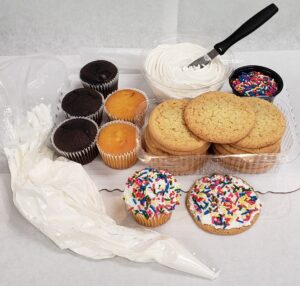
- NEW! And, perfect for Mother’s Day….our Fun At Home Kits. Each kit includes:
- 3 yellow cupcakes
- 3 chocolate cupcakes
- 8 sugar cookies
- 16 oz. of our butter cream frosting
- 2 oz. rainbow sprinkles
- A pastry bag
These kits are a great and delicious family activity!
Let our Price Chopper/Market 32 Supermarket Floral Departments help you find something special for MOM!
- – Make your own bouquet at home with the 3 for $15 flower bundles
- – Check out our other pre-made bouquets and floral service
- – Choose from our beautiful flowering hanging baskets, perennials and other plant options
What’s happening in the Price Chopper/Market 32 Kids Cooking Club kitchen to celebrate Mother’s Day and Cinco de Mayo?
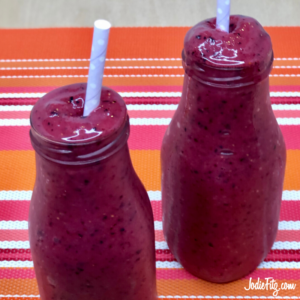
– A Mixed Berry Smoothie you can make and share with mom; but you’re going to want to mark this recipe because it’s so delicious you’ll want it all summer long!
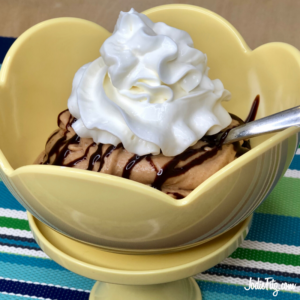
– Chocolate Peanut Butter Banana” Ice Cream”, which is dairy free, can be made nut free AND tastes just like you are eating ice cream. YUM!
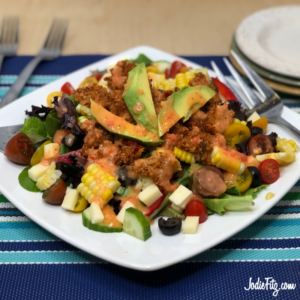
– Quinoa Taco Meat! Say What? I know, I know, but TRUST me…you’re going to love it.
So, grab an apron, all of the ingredients you need and let’s get experimenting in the kitchen together.
Cheers to another Tasty Month ~ Jodie
Mixed Berry Smoothie
Kids Lessons in the Kitchen:
- Measuring ingredients
- Blending safety
- Following directions
- Experimenting with different flavors
- Vegetable inclusion
3 cups PICS frozen berry medley fruit
1 1/2 cups rice milk
1 cup fresh baby spinach
6 oz. vanilla coconut yogurt alternative
2 tablespoons PICS honey
1 teaspoon raspberry extract
½ teaspoon PICS vanilla extract
Measure and add the frozen berries, rice milk, spinach, vanilla yogurt, honey, raspberry extract and vanilla extract into the blender. Mix well & serve.
Frozen Berry Medley: You can purchase a frozen berry medley, which contains fresh frozen strawberries, blueberries, raspberries and blackberries with no added syrups or sugars. It can be found in the frozen fruit section at your local Price Chopper/Market 32 Supermarkets or you can create your own berry mix with frozen fruit.
Spinach Measurement: Use a loosely packed measurement on this recipe vs. densely packed.
Other Dairy Free Options:
- Try coconut milk for a creamier consistency. (optional depending on your dietary needs)
- Try other vanilla dairy free yogurts (soy, oat, etc.)
What about dairy? Yes, you can make this with dairy yogurt and regular low fat milk.
Chocolate Peanut Butter Banana “Ice Cream”
3 frozen bananas
¼ cup PICS peanut butter or WOWButter®
2 tablespoons PICS honey
1 teaspoon PICS cocoa powder
1 teaspoon PICS vanilla extract
A pinch of PICS cinnamon
Freeze the bananas.
In a separate bowl, stir the peanut butter or WOWButter®, honey, cocoa powder, vanilla extract and a dash of cinnamon together.
Place the bananas into a food processor or blender. Begin to blend the bananas. After the bananas are chopped up into small pieces, add the remaining ingredients into the blender or food processor. Continue to blend until the mixture forms into a soft ice cream.
Serve immediately.
How to freeze bananas:
Option 1: Line a baking sheet with parchment paper. Peel the bananas. Slice the banana. Lay the sliced banana pieces flat on to a baking sheet. Cover them with another piece of parchment paper. Freeze the bananas for a couple of hours. Either use the frozen bananas immediately for a recipe or place the frozen pieces into a snap and seal freezer style bag and keep them in the freezer.
Option 2: Can you freeze a whole banana? Yes you can! Simply place a whole banana(s), peel and all into the freezer. Let it freeze. When you are ready to use the frozen banana, let it sit for a few minutes before peeling.
WOWButter® is a peanut and tree nut free peanut butter alternative. You can find this item in your Price Chopper/Market 32 Supermarkets in the allergy friendly aisle.
Serving Ideas: This Chocolate Peanut Butter Ice Cream Recipe is delicious served all on its own. However, it’s also good with a few toppings;
- PICS chocolate syrup
- Chocolate sprinkles
- Melted peanut butter or WOWButter®
- PICS Whipped topping
- Chopped nuts (optional depending on your dietary needs)
- Chopped Reese’s candy (optional depending on your dietary needs)
Kids Lessons in the Kitchen:
- Measuring ingredients
- Preparing fruit
- Knife safety
- Cutting skills
- Freezing fruit
- Blending safety
- Following directions
Quinoa Taco Salad
2 cups uncooked quinoa
4 cups vegetable broth
2 tablespoons PICS butter
1 ½ cups PICS salsa
1 tablespoon PICS ground cumin
2 teaspoons Full Circle ground chili powder
1 ½ teaspoons PICS onion powder
¾ teaspoon PICS garlic powder
¾ teaspoon sea salt
¼ teaspoon PICS white pepper
PICS nonstick cooking spray
Rinse the quinoa in a mesh strainer.
Heat a medium size saucepan over medium heat. Once it’s hot, add the rinsed quinoa and toast it for 3-4 minutes, stirring frequently.
Add the vegetable broth and butter to the quinoa, bring the mixture to a boil over medium to high heat. Reduce the heat to low, cover with a secure lid, and cook the quinoa as directed on the package, or until liquid is completely absorbed. When it’s done cooking, remove the lid, fluff the cooked quinoa with a fork and let it set for 10 minutes uncovered.
Preheat oven to 375°F.
In a small bowl, stir together the salsa, cumin, chili powder, onion powder, garlic powder, salt and white pepper.
In a large mixing bowl, stir the cooked quinoa together with the salsa and spices,
then spread onto a lightly greased, parchment-lined baking sheet.
Bake for 30 minutes, stirring/tossing once at the halfway point to ensure even baking. The quinoa is done when it’s fragrant and golden brown. Be careful not to burn!
Add the quinoa to your favorite salad mixture with your favorite salad fixings to serve. Options include;
- spring mix
- romaine
- fresh tomatoes
- olives
- cucumbers
- avocados
- sharp cheese
- corn
- black beans
- and more…
Top it Off: You can always use your family favorite. Consider checking out some of our delicious fresh dressings in the produce area at our Price Chopper/Market 32 Supermarkets. There are many vinaigrettes and ranch dressing options that include cucumber, avocados and cilantro that would be delicious on this salad combination.
Leftovers: You can keep the leftover taco quinoa in the refrigerator for 4-5 days.
Reheating leftovers: The left overs can be reheated in the microwave, but the oven, a toaster oven or skillet are tastier options.
Kids Lessons in the Kitchen:
- Measuring ingredients
- Stove top safety
- Oven safety
- Knife safety
- Cutting skills
- Salad/vegetable prep
- Following directions


