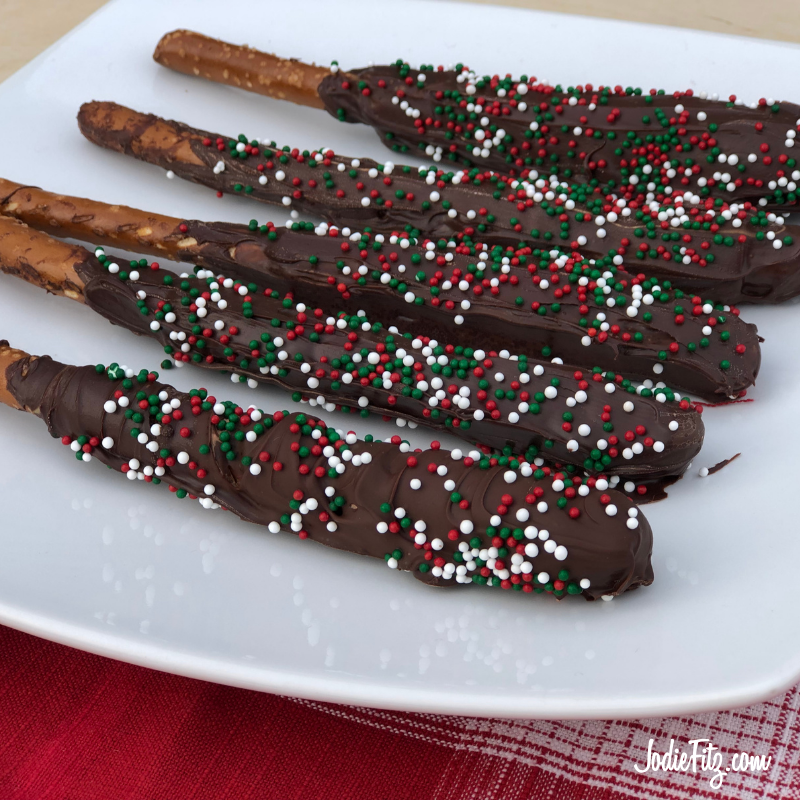
Chocolate Covered Pretzels with Caramel and Peanut Butter
Jodie Fitz
PICS Pretzel rods
PICS Mini chocolate morsels, dark, milk or semi-sweet
Caramel apple wraps
PICS Peanut butter (optional)
Colored sprinkles
PICS Nonstick cooking spray

Coat a pizza cutter with nonstick cooking spray.
Place the caramel wraps, one at a time, on a cutting board with a piece of parchment paper between the caramel wrap and your cutting board. Note: The caramel comes with parchment paper dividers that you can use; this prevents the caramel from sticking to the cutting board.
Using the pizza cutter, cut the caramel wraps into one inch strips.
Starting at least two inches from one end of the pretzel, carefully wrap the caramel strips around the rest of the pretzel. Set the caramel wrapped pretzels onto a wax paper lined cookie sheet and set aside.
Pour chocolate morsels into a tall drinking glass, Microwave the chocolates in the glass on high for one minute. The chocolate will not look fully melted, stir the morsels together until they fully melt after removing the glass from the microwave.
Dip the caramel covered pretzel into the chocolate leaving the unwrapped end exposed.
Set the pretzel back onto the waxed paper and coat with a thin layer of colored sprinkles.
Let the pretzels set until the chocolate has hardened.
Keep the pretzels in cool storage.
The Caramel Wraps? You can typically locate these in the produce area of your Price Chopper and Market 32 Supermarkets near the apples.
Add Peanut Butter! Simply spread a light layer of peanut butter onto the pretzel before wrapping it with caramel. Follow the rest of the directions as is.
Nut allergies? Replace the peanut butter powder with WowButter®. It’s a delicious nut free, tree nut free, gluten free peanut butter alternative. It can be found in the allergy friendly aisle at your Price Chopper and Market 32 Supermarkets.
So Much Fun with Kids! There’s lessons in every recipe making experience for the kids in your life. Here are a few activities to concentrate on when making this no bake pretzel fun;
- Cutting safety
- Wrapping
- Dipping
- Melting chocolate
- Spreading
- Sprinkling
- Following directions
Chocolate Caramel Filled Shortbread Cookies
Jodie Fitz
½ cup PICS butter, room temperature
1 teaspoon PICS vanilla extract
1 PICS egg, large
½ cup PICS confectioner’s sugar
1 ½ cups PICS all-purpose flour
¾ cup PICS mini chocolate chips
Filling
2 tablespoons PICS butter
3 tablespoon PICS milk
5 oz. Caramel candies, unwrapped
¼ cup mini chocolate chips
Preheat the oven to 350 degrees.
Using an electric mixer, whip together the room temperature butter with the vanilla extract, egg and confectioner’s sugar. Slowly add in the flour continuing to mix with the electric mixer until all ingredients are mixed well.
Using a spatula, fold in the mini chocolate chips.
Form the dough into small cookie dough balls and slightly flatten them and place them onto a parchment paper lined baking sheet.
Using a tablespoon sized measuring spoon, dip the base of the measuring spoon into confectioner’s sugar and press it into each cookie to create an indent.
Bake the cookies for 10 – 12 minutes.
Recipe makes approximately 18 cookies.
While the cookies are baking and cooling, prep the filling by first melting 2 tablespoons of butter over low heat in a saucepan. Once melted, over low heat, add in the 3 tablespoons of milk, 5 oz. unwrapped caramel candies and stir until the candies have melted and the three ingredients are mixed together well. Turn off the heat and add in ¼ cup of mini chocolate chips. Continue to stir until they are fully melted and mixed in.
Add the filling into a piping bag once it’s slightly cooled and can be handled. If you don’t have a piping bag, add the filling to a quart sized freezer bag and clip one corner.
Pipe the filling into the cookie indent. Let the cookies set until the center hardens, approximately 30 minutes.
Optional: Add sprinkles on top before the center hardens.
Storing: If you are layering the cookies when storing in an airtight container, keep a of layer parchment paper between the layers to prevent the cookie centers from sticking to other cookies.
So Much Fun with Kids! There’s lessons in every recipe making experience for the kids in your life. Here are a few activities to concentrate on when making these cookies:
- Measuring ingredients
- Mixing
- Electric mixer safety
- Melting
- Stovetop safety
- Piping
- Following directions
