


These meals are crowd-pleasers, timesavers, and budget buddies – we bet there won’t be any leftovers either! Market 32 Meatball/Meatloaf Mix is freshly seasoned so you have a delicious base to build with. Let’s check out this week’s ingredients, shall we?
Meatball Slider Bake
1 lb. Market 32 Meatball/Meatloaf Mix
1/2 lb. Market 32 Deli Sliced Provolone
1 jar (24oz.) PICS Marinara Sauce
1 Yellow Onion
1 Seedless Cucumber
1 package Bakery Brioche Buns
Shop for Meatball Slider Bake here!
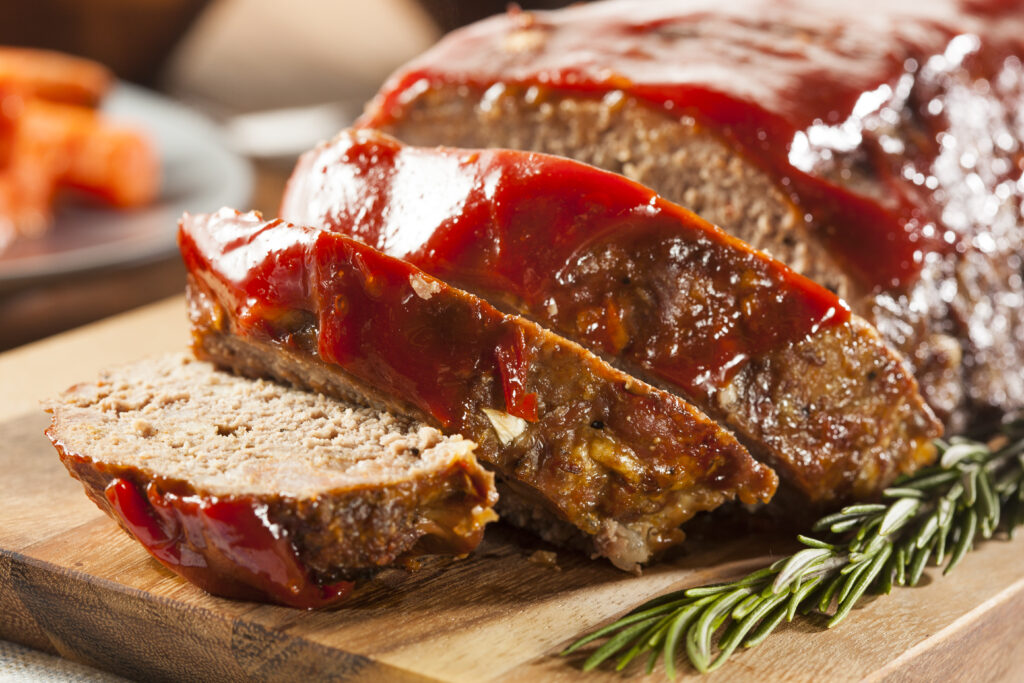
Meatloaf
1 1/2 lbs. Market 32 Meatball/Meatloaf Mix
1 1/2 lbs. Sweet Potatoes
1 pouch PICS Beef Gravy
1 bag Pero Farms Green Beans
Shop for Meatloaf here!
Meal 1: Easy, Cheesy Meatball Slider Bake and Cucumber Salad
A crisp, bright side salad brings crunch and zest to complement the savory, cheesy sliders. YES!
Essentials: 2 cutting boards, large, serrated knife, sheet pan, Simply Done Aluminum Foil, 2 Simply Done gallon storage bags, large bowl for salad, paring knife, vegetable peeler (optional) liquid measuring cup, meat thermometer
From the Pantry – 3 TBSP PICS Unsalted butter, melted; PICS White Vinegar, PICS Sugar, Italian Spice Blend
Food Safety notes: Wash hands before and after handling raw and cooked meat. Wash cucumber before slicing. Use separate cutting boards and knives for each food group.
Directions:
– Preheat oven to 350 degrees.
-Place 2 sheet pans on the counter, and cover with aluminum foil. Spray aluminum foil with PICS Vegetable Oil. Count the number of rolls in the package of rolls you are using, and plan to make the same number of meatballs. For this recipe, we will use 12 as the number of rolls and servings.
-Place 1 cutting board on the counter, and transfer meat from the package to the board. Flatten the meat slightly, and lightly score with a butter knife in a cross-section pattern to get to the # of sliders/servings you need.
- For example, scoring 3 lines from left to right, and 4 from top to bottom should yield 12 even-ish portions that can be cut and rolled into meatballs. (Hack/optional – Use the 2 storage bags as “gloves” to make meatballs, (you can secure with a rubber band or chip clip) rolling them to your preferred size, and flattening slightly as you place them on one of the sheet pans. Put the meatballs in the oven to cook for about 20 minutes, or until an instant read thermometer says 145 degrees. Remove from the oven and place the pan on top of the stove, allowing it to cool for a few minutes.
-While the meatballs are cooking, remove the rolls from the package and cut in half, placing close together on the second sheet pan.
-Place a ½ slice of provolone on the rolls. They can touch or overlap slightly.
-Place the warm meatballs on top of the cheese. Spoon PICS Marinara onto each meatball, then sprinkle with Italian Seasoning.
-Place second piece of cheese on top of the sauce, and top with the rest of the sliced bun.
-Brush the tops of the sliders with melted butter, and sprinkle with additional Italian Seasoning.
-Cover with foil and bake for 15-20 minutes, or until cheese is melted and meatball internal temperature is 145 – 160 degrees.
-While the sliders are baking, using the clean paring knife and clean cutting board, make the cucumber salad. Depending on the number of people you are serving, plan ½ cup sliced onion for each cucumber, assuming they are average size. If you prefer, peel the cucumbers with the vegetable peeler, then slice. I like to peel stripes for a nice presentation and added texture. Place cucumber slices and onion in the bowl. In a liquid measuring cup, pour ½ cup of white vinegar, ½ cup water, 2 teaspoons of sugar, and 1 teaspoon table or Kosher salt. You can also use apple cider vinegar if you prefer a sweeter vinaigrette, and a pinch of dried dill or parsley. Toss and set aside to serve with the sliders.
Meal 2: MMMMMeatloaf Dinner – Sheet Pan Easy
Essentials: 2 Simply Done Gallon Storage Bags, 2 Sheet pans, Simply Done Aluminum Foil, 1 cutting board, 1 chef knife, small saucepan, wooden spoon, large tongs, meat thermometer
From the Pantry: PICS Olive Oil, Cayenne pepper or other favorite spice.
Food Safety Smart – Wash produce before preparing, leaving the skin on the sweet potatoes and leaving the green beans in the colander to dry. Wash hands before and after handling raw meatloaf, even if you are using the plastic bag hack.
Directions:
-Preheat oven to 375 degrees.
-Prepare 2 large sheet pans with Simply Done Aluminum foil. Spray both pans with PICS Vegetable Oil.
-Hack – (optional) – using plastic bags as “gloves”, remove the Meatloaf Mix from the package and place it on one of the sheet pans. (You can also use bare hands, and wash again before touching other food or utensils.) Shape the meatloaf to a low, rounded loaf shape. Remove and discard the plastic bags. Wash hands again, and place the meatloaf pan in the oven, lower rack. Set a timer for 10 minutes.
-On the cutting board with the chef knife, cut the sweet potatoes into 4 lengthwise wedges each. Place them the second sheet pan on one end of the pan, skin side down, slightly apart. Lightly spray with PICS Vegetable Oil, and sprinkle with a pinch of cayenne or Cajun seasoning. When the set timer rings, open the oven, and place the second sheet pan on the upper rack. Set the timer for 10 minutes.
-Place the colander in the sink, or on a paper towel. Pour 2 TBSP of PICS Olive Oil over the green beans in the colander, tossing with the tongs to coat in the oil. Season with a sprinkle of garlic powder, if you like.
-When the timer goes off the second time, remove the upper rack sheet pan, spray again with vegetable oil, and spread the green beans on the empty side of that pan. Return the pan to the oven and set the timer for 10 more minutes.
-Combine beef gravy mix with approx. 1 cup of cold or boiling water, stirring vigorously with a whisk for 1 minute. Heat and simmer for another minute, stirring occasionally.
-When the timer goes off the third time, test the meatloaf with the thermometer. It should be about 158-160 degrees. Continue cooking until temp reads 160, 5 – 8 more minutes if needed. Remove the pan to the stove top. You can also check the tenderness and color of the sweet potatoes and green beans, removing them to a heat safe surface when the wedges are lightly browned, and the green beans are roasted and tender. Allow the meatloaf to rest for about 5 minutes before slicing. Divide the vegetables on 4 plates, along with sliced meatloaf. Add gravy as desired, and serve it up! MMMMMM……….
This week we are reeling in some delicious shrimp meals for all our shrimp fans! Our first meal highlights the delicious taste of garlic and soy sauce, while our second recipe explores the tropical flavor of sweet pineapple. Before we jump in, let’s take a look at this week’s meal items.
Lemon Garlic Shrimp
1 lb. Market 32 Raw Shrimp
1 bag (32oz) PICS Original Enriched Long Grain White Rice
1 bag (10.5oz) PICS Frozen Cauliflowered Rice
1 Lemon
1 Garlic Glove
1 Container Nature Sweet Cherubs
Shop for Lemon Garlic Shrimp!
Shrimp Pineapple Stir Fry
1 lb. Market 32 Raw Shrimp
1 bag (32oz) PICS Original Enriched Long Grain White Rice
1 bottle (10oz) PICS Teriyaki Sauce
1 Whole Pineapple
1 bag (16oz) PICS Frozen Onions & Peppers
Shop for Pineapple Stir Fry!
Meal 1: Lemon and Garlic Butter Shrimp and Cauliflower Rice Casserole
This can be a planned or last-minute meal! If you can plan, defrost bag of shrimp overnight in the refrigerator. (Hack – place the bag in a glass container or on a dinner plate to catch any melting water from the package.) If not, you can quickly defrost shrimp under cool running water when you are ready to cook.
Wash and dry lemon. Slice in half, and slice 4 thin rounds for garnish. Zest the lemon halves, placing zest in a small bowl. Juice the lemon halves and set aside in a measuring cup or small bowl.
Preheat oven to 200 degrees.
Remove tails from raw shrimp, rinse and place them on a clean plate or bowl. (Flavor Full Hack – If you like, you could add herbs and spices to the raw shrimp, such as Italian Herb Blend or Sriracha sauce. Both will blend well with the lemon, garlic, and butter.)
Use a large saucepan and follow package directions to prepare 4 cups of whole grain brown or white rice. When rice is cooked, fluff with a fork, remove half and place into a bowl to cool. Return pot cover to keep warm.
While rice is cooking, pour about 2 TBSP oil in the skillet, and turn heat on to medium high. When oil begins to heat up, add garlic. Stir, allowing garlic to lightly brown and flavor the oil. Remove from oil and keep next to the stove in a small bowl.
Add cherry tomatoes, allowing them to soften and split, when they are tender, add the cauliflower rice and lemon zest. Stir to combine and heat the cauliflower rice through.
Remove veggies to a shallow casserole dish and add two cups of prepared rice to the casserole. Add the browned garlic. Mix gently, cover with foil, and place the casserole dish in the warm oven.
Return skillet to the burner and add 1 Tbsp PICS Olive Oil and the 2 TBSP of PICS Unsalted Butter. Heat at medium temperature until butter is melted, (don’t allow the butter to burn).
Add the shrimp and lemon juice to the skillet, and sauté quickly until shrimp are opaque and firm.
When done, remove the casserole dish with veggies and whole grain rice from the oven. Add the shrimp and all the liquid from the skillet, using the wooden spoon to scrape any bits. Divide into 4 servings, and garnish with the lemon slices. Enjoy!
Leftover love – if there is any! Make the leftovers a work lunch – drain and rinse a can of PICS white beans. Mix 1.2 cup into the shrimp and rice for a pop of plant-powered protein that plays well with the flavors in the casserole and powers you through your busy workday!
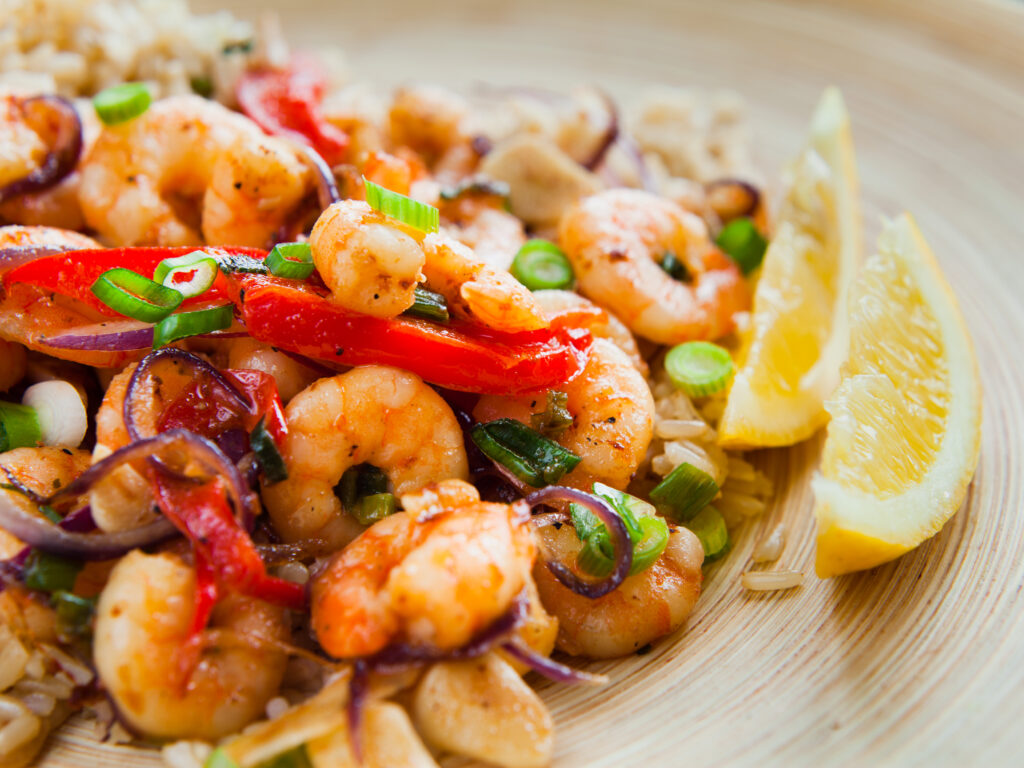
Meal 2: Teriyaki Pineapple Shrimp and Rice Stir-Fry
The fresh pineapple makes this stir-fry special! Using the leftover rice from the first prep day saves time and budget, along with the frozen onions and peppers – already prepped and can go from freezer to pan. Bonus – you enjoy 2 servings of seafood in one week, as recommended by the Dietary Guidelines for Americans!
Defrost bag of shrimp overnight in the refrigerator. (Hack – place the bag in a glass container or on a dinner plate to catch any melting water from the package.) If not, you can quickly defrost shrimp under cool running water when you are ready to cook.
Place leftover prepared rice in the bowl with a ¼ cup of water. Cover and place in the microwave, but do not heat until you are ready to serve the Shrimp and Vegetables.
Remove frozen veggie bag from the freezer and open it, leaving it ready near the stove.
Wash hands and place pineapple on the cutting board. Cut off the bottom of the pineapple, then stand on end and slice the hard skin off, using the top to hold it steady. Slice the pineapple off into long spears, trimming the top end off, and set half aside. Chop the remaining half into bite sized pieces.
Place skillet on the stove. Add oil and turn on to medium heat. Add frozen veggies to skillet, allowing them to soften and for 2 – 3 minutes, or until defrosted and softened. Add the defrosted shrimp, moving quickly around the skillet. When shrimp is almost fully cooked, add ½ cup Teriyaki sauce, and stir to combine with the sauce and veggies.
Warm rice and water in the microwave for 2-3 minutes, fluffing with a fork once to heat evenly. Divide rice and plate, then top with stir-fried shrimp and vegetables. Enjoy!
Double Bonus! Caramelized Pineapple Dessert – Chop remaining fresh pineapple into bite-sized pieces. Heat a large skillet or griddle and melt 2 – 3 TBSP butter. When butter is melted, add ¼ cup of PICS Light Brown Sugar and a dash of salt. If you like, you can also add ½ tsp vanilla. Bring butter mixture to a simmer. Add the chopped pineapple, stir to coat the pieces, and raise heat to medium high, allowing it to reach a low boil. (If needed, you can add another TBSP butter.) Cook, stirring occasionally, for about 6 minutes, ensuring the sugar doesn’t burn. Remove from heat and allow to cool slightly – serve as is, OR top with PICS Whipped Cream, OR over PICS Vanilla Ice Cream. Whatever you do, don’t leave the kitchen or it will be gone before you come back! Caramelized pineapple can also be stored in a covered, microwaveable dish in the refrigerator, and served cold or reheated within 3 days. YUM!
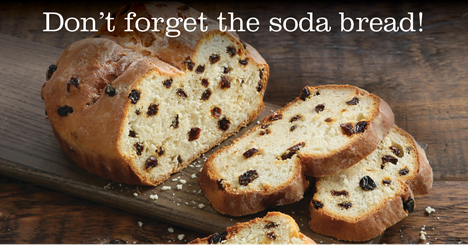
History of Irish Soda Bread on St. Patrick's Day
We love a good St. Patrick’s Day dinner. Corned beef, cabbage, a Guinness or two. It’s perfect. But next to those big players sits another staple of the meal, Irish soda bread. Without a good soda bread your Irish feast is incomplete, it’s an essential side dish and this year we want to put a bigger focus on it. Let’s learn about the history of Irish soda bread and how it became associated with the holiday.
The first documented people to enjoy soda bread were the American Indians. They used pearl ash, a natural form of soda created from the ashes of wood, to make their bread without yeast. However, this practice became known worldwide when the Irish discovered and replicated it. And although its heavily associated with St. Patrick’s Day, Saint Patty himself was around well before soda bread was well-known.
Irish soda bread was first created in the 1830s, when baking soda was first introduced to the UK. At the time, Ireland was facing financial hardship and lack of resources, so they turned to soda bread out of neccessity, it was inexpensive and required few ingredients. Wheat flour, baking soda, salt, and soured milk was all they needed. Even Irish families who lived in the most isolated parts of the country could gather the ingredients to make soda bread. At the time, many of the lower class in these remote areas did not have oven access, so they used iron pot and griddles over open hearths. A unique cooking method that gave soda bread its dense texture, hard crust, and slight sourness.
Despite its humble beginnings, Irish soda bread has become a large part of the typical St. Patrick’s Day feast and plays a major role in Ireland’s culinary history. Pick up your own loaf of Market 32 Irish Soda Bread online or at your local store.
Happy St. Patrick’s Day!
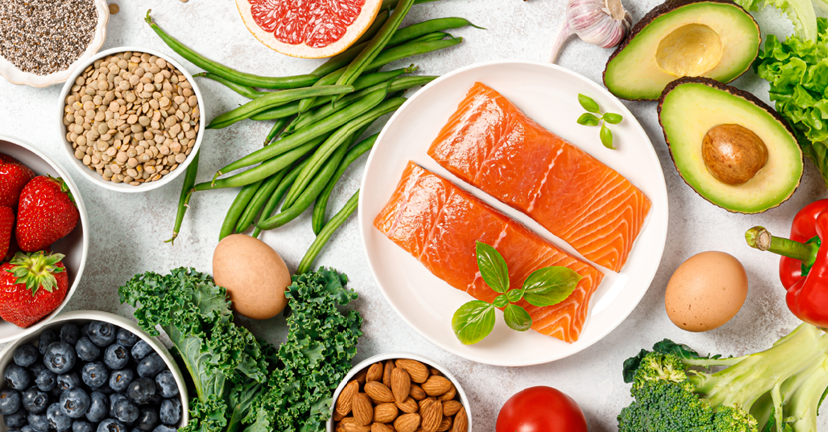
Celebrate Registered Dietitian-Nutritionist Day!
Ellie Wilson
MS, RDN, CDN
It is one of my favorite days of the year – a day when I get to celebrate the work of my peers and how they improve wellbeing through the transformative power of nutrition, celebrated every year during March, National Nutrition Month. You may not realize it, but you benefit from the work of registered dietitian-nutritionists (RDNs) every day, and so do many people in your life! RDNs work throughout our food systems, from farm to table, molecule to menu, recipes to research, and most importantly, they translate the science of food, culinary skills and clinical nutrition into solutions and communications that serve individuals, communities, and populations.
In your communities, RDNs often direct school food systems, working to fuel growth and learning for our children, and help them explore healthful eating. RDNs direct hospital-based clinical nutrition and food service, food banks and community-based organizations, restaurant chains, military operations, food product development, work in academics and sports, public health prevention and medical nutrition treatment across the entire lifespan. RDNs are also chefs, farmers, entrepreneurs, and culinary nutrition educators. RDNs may also be board-certified in advanced practice, pediatrics, sports nutrition, gerontology, and nutrition support. It is a dynamic field centered on meeting the needs of all with evidence-based, empathetic, and respectful nutrition science and care.
RDNs have been part of all those institutions for over 100 years but were rarely powered or resourced well enough to deliver and measure the full value of their expertise. That is changing – the most recent shift in focus on nutrition and health has risen to prominent view in the last 10 years. The true capacity of RDNs to meaningfully change health when the right infrastructure is in place has broken through via Food-as-Medicine initiatives. These programs have been growing out of non-profits that created services when there was no other way to meet specific nutritional needs. The New York State Department of Health has also worked to build capacity through many innovation initiatives. This included produce prescription programs and RDN-prescribed, medically tailored meal programs serving our most vulnerable and chronically ill. When data systems began to track that care and outcomes, the opportunity became clear – when food and nutrition treatment with RDNs is available, quality of life and the ability to recover and thrive is not just possible, it changes everything about costs, and empowering patient confidence and capacity to restore health, elevating the importance of applied nutrition science and access to qualified nutrition care to the health of our communities, states and country. This is interwoven with other societal issues and allied health disciplines driving change through social determinants of care – it all comes together in prevention and treatment that fuels health, equity and opportunity.
I have the privilege of serving our communities through the work I do at Price Chopper/Market 32 – ensuring food information is the best it can be in all the channels it is needed: for our customers’ and teammates’ benefit, for business operations, and community and healthcare collaborations with resources like the Know Your Colors nutrition guides program in Price Chopper and Market 32. I love the work I do, and continually learning how to support my peers in their vital roles using nutrition to safeguard and promote wellbeing. To better illustrate what that can mean, I will share a statement from a fellow RDN quoted in our professional journal this month. Alice Dunham, MS, RD, LD/N, works with veterans in Sarasota, Florida. She wrote: “I am proud to be a registered dietitian-nutritionist because every day I am a public servant. In my role, I am serving as a mental health dietitian for veterans in transitional housing. Witnessing the positive impact nutrition therapy has on a person’s psychological health and overall well-being is special. I am able to help this population work through challenges including food safety, nutrition security, feeding environments, food relationships and budgeting a balanced diet. Each day feels like I am fulfilling a great purpose: to heal people through food. It is the most rewarding profession. I am so grateful to be a nutritional caregiver daily and help people navigate their health.”
Me too – knowing the work I do supports so many ways food brings joy and health is why I entered this profession. Wishing all my friends and colleagues the very best on RDN Day!
Corned Beef Cuisine: Creative Recipes for a Tasty Twist!
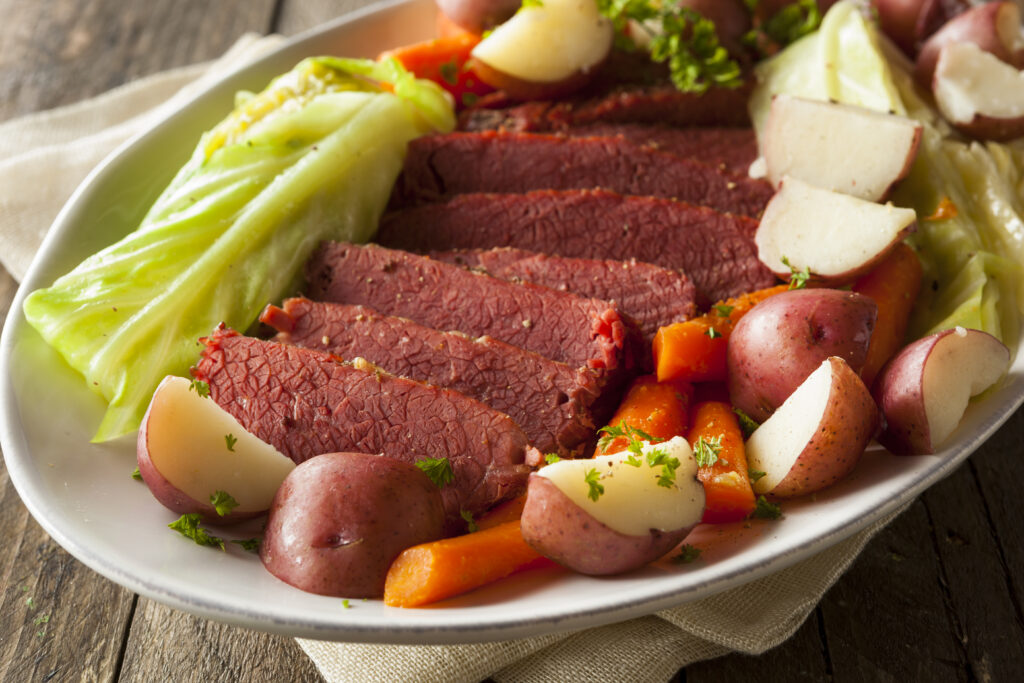
Happy St, Patrick’s Day . . . Irish you were here! As we celebrate Irish heritage with luck, celebration and plenty of green there tends to be a popular meal that comes to mind for this holiday. Corned beef is commonly utilized in America as a festive dish that people eat while celebrating. Though this meal is widely popular in America, many years ago it wasn’t even associated with St. Patrick’s Day!
Corned beef grew popularity once Irish immigrants arrived in America and had to acclimate to different food demands. Corned beef became popular amongst immigrants due to the fact that it was similar to Irish bacon and readily available in the states. Commonly, corned beef is paired with various sides such as potatoes, cabbage and carrots. Though this Irish-American dinner is delicious on its own, there are many ways to dress up your corned beef in various recipes for this upcoming St. Patrick’s Day!
Corned Beef with Vegetables with Mustard-Dill Sauce: Starting out simple! If you want to enjoy a classic corned beef dinner, there shouldn’t be a reason you can’t! Add a new flavor palette to a classic St. Patrick Dish with a tangy Mustard-Dill sauce that is as good as it is easy to whip up in seconds! It’s an effortless way to elevate you St. Patrick’s Day meal.
Black Irish Rubeen Sandwich: Take on St. Patrick’s Day with a mouthwatering Rueben sandwich. This sandwich is smothered in delicious coleslaw, melty cheese and plenty of salty corned beef for a burst of flavor in each bite. Sandwiched between two pieces of pumpernickel bread, a Black Irish Rueben takes minimal time to assemble and is flavorful bite after bite!
Freezer-Friendly St. Patty’s Corned Beef-Sweet Potato Hash: Corned Beed Hash is a classic breakfast staple, but have you ever tried it with sweet potatoes? Elevate your breakfast game utilizing corned beef and sweet potatoes for a new element of salty and sweet. This recipe is freezer friendly, and when you’re ready to munch on your hash, add a drizzle of hot sauce for a kick in every bite!
BBQ Corned Beef Wraps: Last but not least, enjoy your corned beef in a wrap! Smothered in tangy and sweet BBQ sauce, a wrap is an effortless way to utilize any leftover corned beef. These wraps take as little as 15 minutes to make and serve up to four people!
Take on St. Patrick’s Day with various—delicious—ways to customize a popular and well-loved dinner! Buy all your Corned Beef supplies at Market 32/Price Chopper.
Remember, it is St. Patrick’s Day so don’t be afraid to go a bit cloverboard! 🍀
Ellie Moloney Wilson
MS, RDN, CDN
We are back with a St. Patrick’s Day edition of our Value Meals! Take a look below at this week’s meal planning items:
Meal 1: Corned Beef & Cabbage
1 lb. Shannon Farms Flat Cut Corned Beef Brisket
5 lbs. bag Market 32 Red Potatoes
1 lb. bag Full Circle Whole Carrots
3 lbs. (about 1 head) Green Cabbage
Shop Corned Beef & Cabbage items here!
Meal 2: Reuben Sandwich
1 lb. Shannon Farms Flat Cut Corned Beef Brisket
1 loaf Market 32 Rye Bread
1 package PICS Sliced Swiss Cheese
1 jar (14oz) PICS Sauerkraut
1 jar (24oz) PICS Pickle Spears
Shop Reuben Sandwich items here!
There are a few weeks of the year when you know what you will be having for dinner, and in my family, this is one of those weeks! The ingredients are well-known and on sale this week, so classic this meal would almost make itself, if you don’t have a family recipe or a friend who always makes enough for the neighborhood. I, of course, have the best recipe – my Aunt Sheila’s, written down about 25 years ago on a now slightly crumpled, “well-seasoned” piece of paper. The ink is smudged, splashed by something at some time but rescued and dried and saved in the recipe box every year since.
Planning this blog got me thinking about meal traditions, how they connect us generationally and how they are reinvented over time – cooked in different pots and ovens, with spices or not, braised and baked and boiled – how many ways can this meal be made? Then I googled “Corned Beef and Cabbage” and got this: About 46,900,000 results!
That is impressive! As I scrolled through, the descriptions told the story of its travels over time -Grandma’s, Mom’s, Dad’s, slow cooker, Southern-style, Instant Pot, and more. Top 40 recipe collections for every food magazine or cooking show, fancy, saucy, and crispy. The corned beef and cabbage meal tradition we know in America has roots in Ireland, but was reinvented and expanded in New York City, when the migration of Irish to America exploded in the late 1800’s, and the community connection of Irish and Jewish residents in neighborhoods with kosher butchers restored access and enjoyment to this iconic meal. *
Meal 1: Corned Beef & Cabbage
There are so many ways to cook corned beef, I thought it would be best to share this link How Long Should I Cook Corned Beef and “season” the blog with hacks and tips.
In case you don’t have a family recipe, we have one for you try: Classic Corned Beef with Cabbage & Potatoes (beefitswhatsfordinner.com)
- Tip – Cook both briskets/roasts at once and store the second wrapped in the refrigerator for the Reuben Sandwich meal. For best results, do not slice the second roast until you are preparing the sandwiches.
- Hack – When the brisket is done according to your recipe, wrap it in foil and place in a small cooler or in an oven set on 150 degrees to rest and redistribute juices into the meat. Rest for at least 45 minutes, ideally up to 2 hours, checking to be sure the internal temperature doesn’t go below 140 degrees. When you are ready to serve, be sure to slice against the grain, or the meat will shred into a stringy (but still delicious) pile versus a juicy, servable slice.
Meal 2: Grilled Reuben Sandwich (or Panini!)
The Reuben is a classic – juicy, savory and succulent, it is an icon by itself. It is also easy to prepare if you already cooked the corned beef.
- From the pantry – PICS Thousand Island Dressing and PICS Unsalted Butter, softened.
- Utensils – Sharp chef’s knife, large, flat spatula for turning the sandwich, fork or tongs for the sauerkraut.
- Prepare a large frying pan with a flat base or a griddle with a spray of PICS Vegetable Oil. Keep a large pot top available to assist with heating the sandwiches and ensuring the cheese melts.
- Hack – warm canned PICS sauerkraut in a saucepan. Keep a large fork or tongs handy to place kraut on the sandwich.
- Slice the brisket against the grain, into thin slices.
Set up your sandwich ingredients – sliced rye bread, sliced corned beef, warmed sauerkraut, sliced Swiss cheese, dressing and butter. When you are ready to assemble, turn the burner heat to low-medium for the pan or griddle.
- Place 4 slices of rye bread on a counter or cutting board and spread 1 TBSP PICS Thousand Island Dressing on one side.
- Place a slice of Swiss Cheese on the dressing.
- Using the fork or tongs, place warmed, drained kraut (hold over the pot to drain for a few seconds) on the cheese.
- Place several slices of corned beef on the sauerkraut.
- Take the top slice of bread and spread 1 TBSP of PICS Thousand Island Dressing on one side. Place the dressing-side down on the sandwich.
- Butter the top side of the sandwich bread.
- Repeat the procedure for all 4 sandwiches.
When you are ready to grill, place some butter in the pan to melt. Carefully transfer the 4 sandwiches to the pan. Place the pot top over the sandwiches or pan to concentrate the heat and melt the cheese. Grill until golden brown on both sides, flipping the sandwiches after 3- 4 minutes. Serve with pickles, Cole slaw and LOTS of napkins! Enjoy!
*Accessed 3/4/2028; https://www.foodandwine.com/news/complicated-irish-history-corned-beef

Happy March! As we approach the end of winter, March provides us with warmer weather and . . . luck! Celebrate the spirit of St. Patrick’s Day by indulging in the rich flavors of McCall’s Irish Cheddar cheese, the perfect accompaniment to honor the luck of the Irish! Price Chopper/Market 32 is thrilled to carry this creamy and buttery yellow cheddar cheese, made by the milk of cows that graze on lush, green pastures!
McCall’s Irish Cheddar is a robust nutty cheese that has a smooth texture that melts in your mouth. Of course, cheddar is the perfect cheese to snack on its own, but it pairs beautifully with cured meats, and a sweet side of jams, apples or pears! Enjoy your McCall’s Irish Cheddar with a bottle of Cabernet Sauvignon or the taste of an English stout to elevate your cheese experience!
Mia Teal
Marketing Coordinator, Paid Media
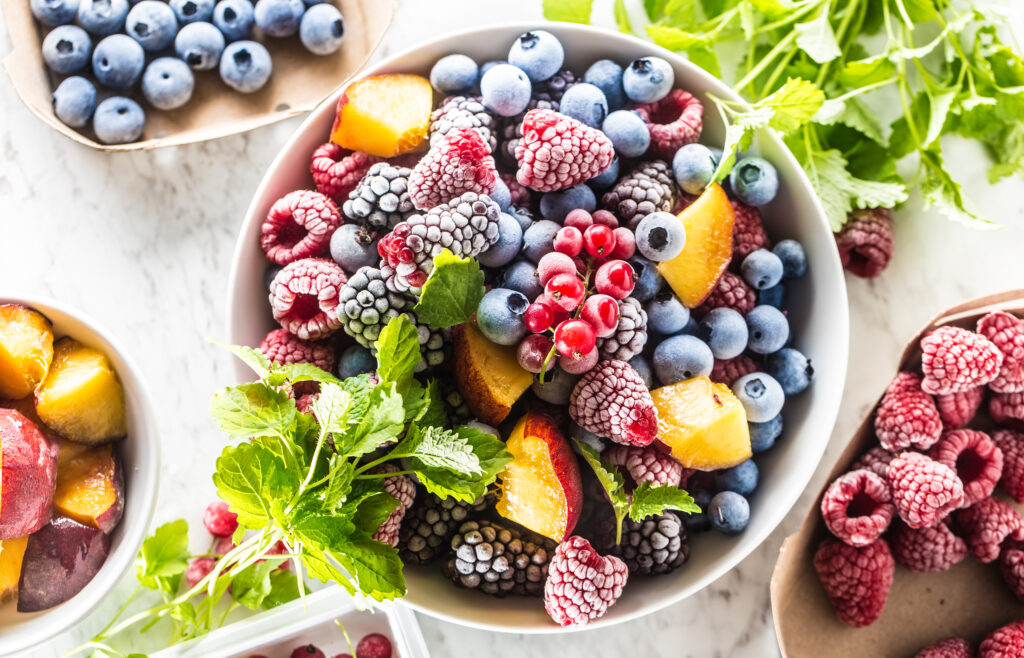
March is Frozen Food Month, and to say we are excited would be an understatement. We are here to bring you delicious, easy recipes as well as introduce our Daily SurPRIZE Game! Want to learn more? Keep reading to find out!
First and foremost, why are frozen foods so spectacular? One of the most significant advantages of frozen foods is their unparalleled convenience. In today’s fast-paced world, where time is of the essence, having a freezer stocked with a variety of options means having quick and easy meal solutions at your fingertips. Whether it’s a busy weeknight dinner or a spontaneous gathering with friends, frozen foods offer the flexibility to whip up delicious meals in minutes.
Moreover, frozen foods eliminate the need for frequent grocery runs and reduce food waste by extending the shelf life of perishable items. They also provide access to seasonal produce year-round, allowing consumers to enjoy their favorite fruits and vegetables regardless of the time of year.
Now for the fun part…recipes you can make with frozen foods! Check a few of them out below:
Strawberry-Orange Smoothie: This seven-ingredient recipe is perfect for breakfast, lunch, or a snack!
Instant Pot® Tortellini & Vegetable Soup: This vegetable soup is sure to warm you up on a cold day! Add in any protein of choice.
Air Fryer Avocado-Veggie Egg Rolls: This recipe is the best appetizer for your next gathering!
Frozen Tropical Bark: With summer just around the corner, practice making this Frozen Tropical Bark recipe! Refreshing and delicious.
Lemon-Pepper Chicken & Rice: Give chicken a new twist with this flavorful recipe!
Remember that game we mentioned above? Don’t think we forgot! Each day until March 23rd, you have a chance to win a variety of prizes, including AdvantEdge Rewards Bonus Points, exclusive eCoupons and more by playing our Daily SurPRIZE game! Be sure to check it out each day here.
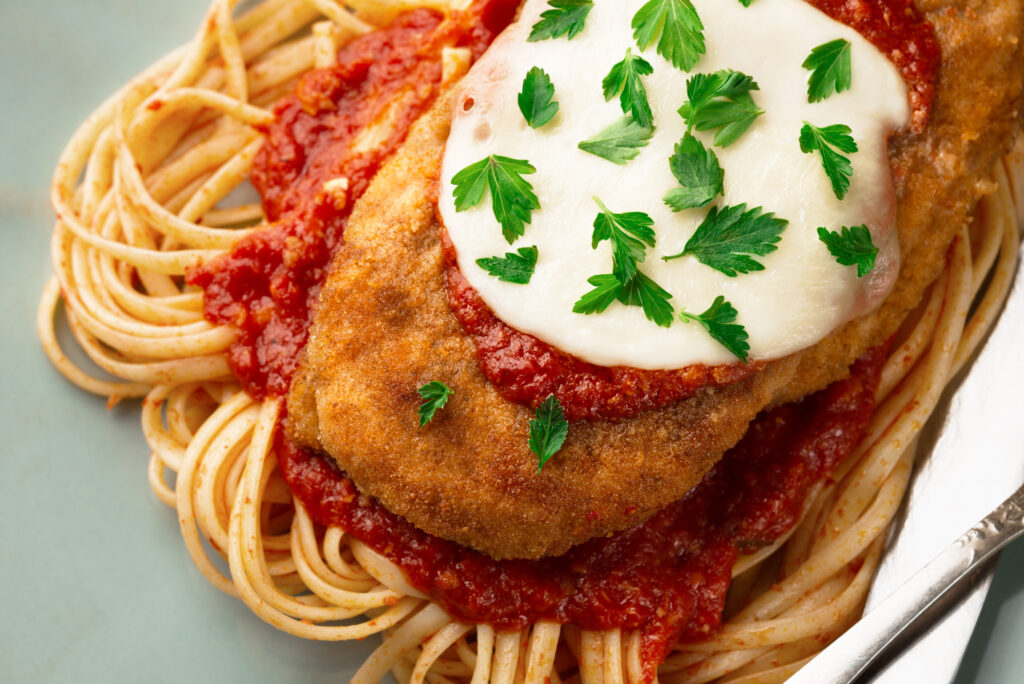
March has marched in and brought its usual unpredictable weather with it. What you can predict is Price Chopper and Market 32 will bring great meal ideas to your table with family favorites and fast fixes that keep your time and budget in shape. Up first this week, Market 32 Savings Pack Skinless Chicken Breasts or Cutlets are ready for a winner, winner, Chicken Parmesan dinner! Both value meals are four servings and under $4 each.
Sheet pans and Simply Done Aluminum Foil help you prep quickly and keep pots and pans to a minimum for quick clean up. For this deal-licous dinner, PICS Panko Breadcrumbs, rich PICS Pasta Sauce and melty Market 32 Fresh Mozzarella come together in a stick-to-your-ribs meal! Birdseye Steamfresh Vegetables (how about broccoli?) are a fast veggie fix ready at the perfect time for serving. This meal plan looks like a lot of steps, but don’t worry – we figured out all the hacks and tips to make it easy. Don’t forget some grated PICS Parmesan Shredded Cheese to add that flavorful finishing touch!
Let’s take a closer look at this week’s meal planning items!
2 lbs. Market 32 Hand Trimmed Fat Free Chicken Breasts or Cutlets
2 packs Market 32 Fresh Mozzarella Cheese (Buy one get one FREE)
1 jar (15oz) PICS Panko Bread Crumbs
1 jar (24oz) PICS Traditional Pasta Sauce
1 package PICS Spaghetti
1 package Birdseye Frozen Vegetables
1 lb. Tomatoes (about 3 total)
Fresh Basil
Winner, Winner Chicken Parm Dinner!
Make chicken parm a new favorite in your house with this delicious, easy, and cost-effective recipe!
- Preheat oven to 425 degrees.
- (Hack- Hot water head start! Fill a large pot with water for cooking spaghetti and turn stove on to low. Place a cover on the pot.
- Open PICS Pasta Sauce and place about 1 cup in a bowl. Keep the remaining sauce in the jar, ready to use on the pasta.
- Hack – place 1 Market 32 Mozzarella package into the freezer. Set a timer for 10 minutes. The cheese will slice more easily if slightly frozen. Don’t allow the cheese to freeze.
- Place the foil on the sheet pan, and spray lightly with PICS Vegetable Oil.
- Place two cups of PICS Panko Breadcrumbs in a low-sided flat-bottomed dish. (Hack – add Italian Blend herbs for extra flavor!) Have the Birdseye Steambag and a serving bowl ready near the microwave.
- Butterfly chicken breasts and use a meat hammer to pound the chicken thin on a clean cutting board. Cutlets do not have to be butterflied or pounded before breading.
- Spray each piece of chicken lightly on both sides and dredge in the PICS Panko. (Tip – the oil helps the breading stick and helps it crisp in the oven, good for oven or air frying.)
- Place all chicken pieces on the sheet pan and place the pan on the top rack in the oven. Set the timer for 8- 10 minutes. Have clean tongs ready to flip the chicken over.
- Remove the mozzarella cheese from the freezer when the timer is done and slice it to your preferred width. Thinner slices will melt faster, and you can layer them if you like extra. Cut enough slices to cover the top of each piece of chicken. Turn the pasta water up to medium/high.
- Turn the oven down to 375 degrees. Remove the sheet pan from the oven to the stove top. Using the tongs, flip each piece of chicken over – they should be a little browned and crisped on each side. Next, spoon 2-3 Tbsp of PICS Pasta Sauce from the bowl on each one. (Food safety tip – discard any remaining sauce in the bowl.) Top with sliced fresh Market 32 Mozzarella, enough to cover most of the meat and sauce. Place the sheet pan back in the oven and set the timer for 8 minutes.
- The pasta water should be boiling – follow prep directions on the PICS Pasta box.
- Place the vegetable steam bag in the microwave, following package directions for temperature and timing. This can be started anytime and warmed for 1 more minute when the rest of the meal is plated.
- When pasta is done, remove one cup of water, and drain. Return pasta immediately to the pot, add the remaining pasta sauce from the jar and some of the reserved pasta water, stirring to combine and coat the pasta. (Tip – you can also add a can of PICS Italian Diced Tomatoes for some extra flavor, texture, and moisture. It is an easy way to nudge more tasty veggies into your meal.) Add more sauce to taste.
- Remove the sheet pan from the oven. Heat steam bag for one more minute. Divide pasta and place on 4 plates. Using the tongs, place the hot, cooked Chicken Parmesan (instant thermometer temp should be 165 degrees) on top of the pasta and sauce. Carefully open the steam bag and place the hot veggies in the waiting bowl, then spoon a heaping serving on each plate. Sprinkle PICS Grated Parmesan Cheese on top of everything for a fabulous finish!
Shop Chicken Parm here!
Fast Fix Fresh Chicken Caprese Dinner
Enjoy the taste of summer with this incredibly fresh recipe!
- Wash tomatoes and basil under cool water, and pat dry. Set tomatoes aside on a clean cutting board with a serrated knife.
- Use the rest of the Market 32 Fresh Chicken Breast or Cutlet second pack for this quick and easy fresh meal.
How you cook the chicken is up to you, or you can let one of your dinner mates feel special and choose how to prepare it. Marinated in a vinaigrette and sauteed? Oven or air-fried with PICS Vegetable Oil and PICS Panko? Grilled with your favorite seasoning? It’s your call!
- While the chicken is cooking, place 4 dinner plates near a clean cutting board.
- Slice tomatoes in 4-5 thin slices each, and Mozzarella Cheese into slices as well.
- Layer tomatoes, cheese, and fresh basil (or jarred pesto) on each dinner plate. Add a little more flavor with a drizzle of balsamic vinegar or lemon juice.
- When the chicken is done (internal temperature should be 165 degrees), place 1 piece chicken next to the plated Caprese salad and serve.
Shop Chicken Caprese Salad here!
Happy National Peanut Butter Lovers Day! Whether it’s for breakfast, lunch, dinner, or anywhere in between we can all celebrate this delicious pantry staple. There are endless ways to implement peanut butter into your diet, but we picked some of our favorites to show how we are celebrating this big day.
Peanut Butter Banana Muffins: Bite into these warm, fluffy Peanut Butter Banana Muffins. Great for breakfast or as a treat later on in the day.
PB&J Stuffed French Toast: This peanut butter and jelly stuffed French toast is a filling and delicious way to start the day. You may never look at French toast the same again.
Peanut Butter and Jelly Breakfast Tart: Move over store-bought pastries, this recipe will sure to be top on your favorites list!
Oatmeal Energy Squares: These Oatmeal Energy Squares are a tasty snack to give you a midday boost. Peanut butter, maple syrup, and blueberries all work together in these yummy squares.
Apple-Peanut Butter Breakfast Nachos: Who says you can’t have nachos for breakfast? This recipe is sure to become a household favorite!
Flank Steak Sate with Peanut Dipping Sauce: Looking to try a new steak recipe? Check out this out… you will not be disappointed!
Creamy Banana & Peanut Butter Cup Smoothie Bowl: In need of a good smoothie bowl? This Creamy Bananas & Peanut Butter Cup Smoothie Bowl is terrific.
Thai Shrimp Zoodle Bowl: This Thai Shrimp Zoodle Bowl uses peanut butter to make an excellent at home Thai food experience.
We love peanut butter and certainly enjoy all the things that can be made with it. If you’re a peanut butter fan check out some of these recipes for yourself! For all things peanut butter stop by your local Price Chopper & Market, or shop with us online.